
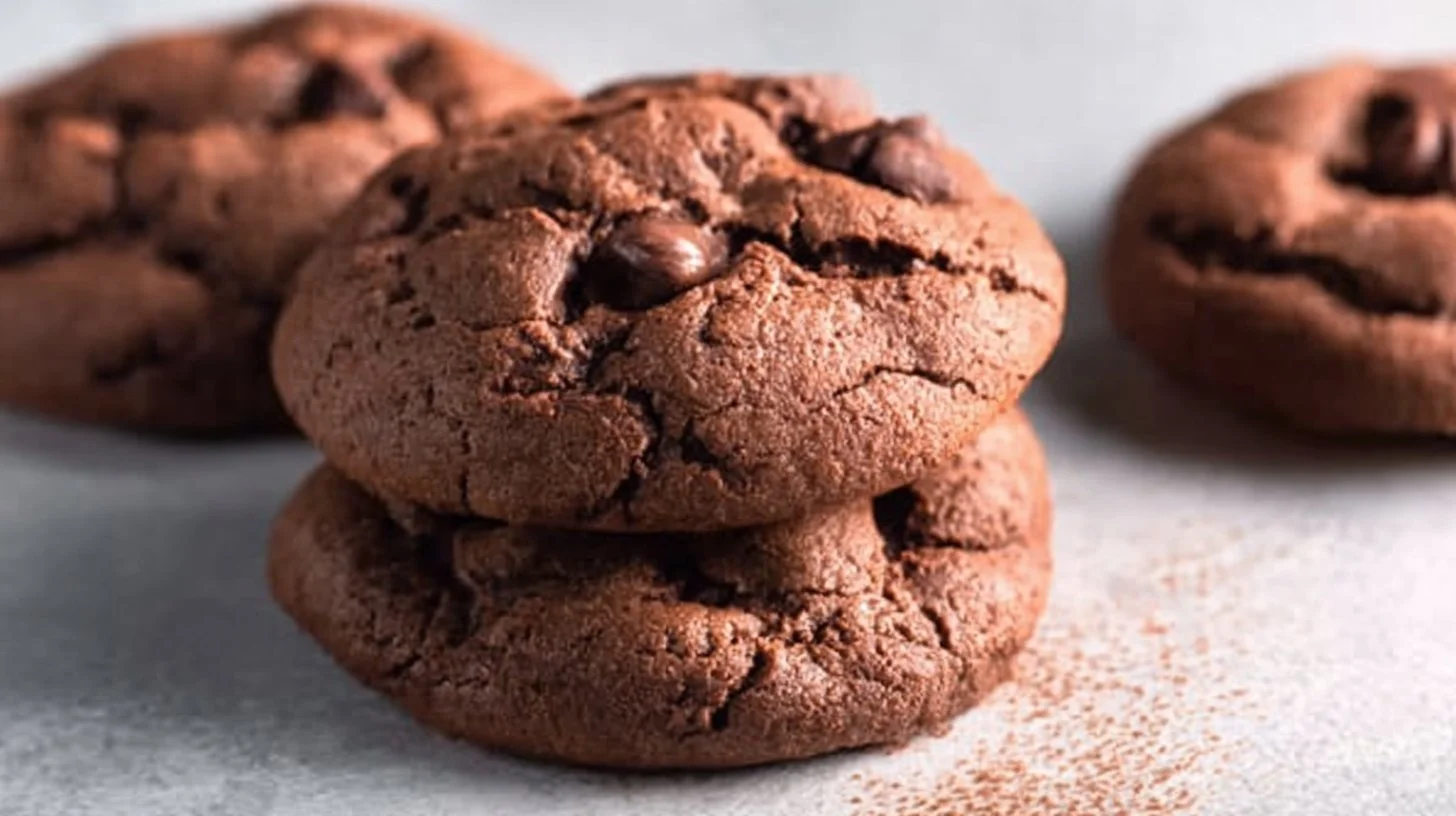
There’s something universally appealing about cookies, especially when they’re quick to make and require minimal effort. These delicious treats come together in no time, and you’ll likely have all the ingredients already in your pantry. Perfect for an after-school snack or a last-minute dessert, the combination of chocolatey Nutella and simple pantry staples promises a delightful cookie experience. Whether you’re baking solo, with family, or for a gathering, this recipe is designed to take the stress out of dessert preparation while ensuring a fantastic outcome.
Why This Recipe Works So Well
The appeal of this cookie recipe lies in its straightforward process and the rich flavor profile that Nutella brings. With just a few ingredients, the recipe proves that delicious cookies don’t always require elaborate methods or exotic components. The combination of Nutella with flour, sugar, and an egg produces a gooey, almost brownie-like texture that is both comforting and delightful.
Moreover, these cookies are perfect for busy weeknights when you want a sweet treat but don’t have the time or energy for extensive baking. The short baking time means you won’t be waiting long to enjoy your freshly baked goods.
Ingredients That Make This Dish Special
- 1 cup of Nutella – this chocolate hazelnut spread is the star, providing rich flavor and moisture.
- 1 cup of all-purpose flour – the base that gives structure to your cookies.
- 1 large egg – this ingredient binds everything together, contributing to a chewy texture.
- 1/2 cup of sugar – adds sweetness and aids in the cookie’s overall flavor development.
- 1/4 teaspoon of salt – enhances the sweetness and balances the flavors.
These simple yet effective ingredients create a taste experience that is hard to resist. Not only do they combine beautifully, but they also allow for fun variations and add-ins based on personal preferences.
Step-by-Step Guide for Perfect Results
- Preheat the oven to 350°F (175°C) to ensure it reaches the right temperature while you prepare the dough.
- In a large mixing bowl, combine the Nutella, all-purpose flour, egg, sugar, and salt. Stir until a cohesive dough forms. Don’t overmix; just combine until you see no dry streaks.
- Using a cookie scoop or a tablespoon, portion out the dough into balls, placing them on a lined baking sheet. Space them about 2 inches apart to allow for spreading.
- Bake in the preheated oven for 8-10 minutes, keeping an eye on them. The edges should be set while the centers remain soft and slightly gooey.
- After baking, let the cookies cool on the baking sheet for a few minutes before carefully transferring them to a wire rack to cool completely. This resting time helps them firm up slightly.

Flavor Profile and Texture Experience
The cookies yield a unique flavor and texture that’s a balance between sweet, creamy, and nutty. Nutella lends its distinct chocolaty flavor, while the sugar creates a delightful sweetness. The baked edges provide a slight crisp, while the centers remain soft and chewy, reminiscent of a brownie. Each bite offers a rich, satisfying experience, with the hazelnut notes making the cookies feel indulgent without being overwhelming. They’re perfect for satisfying sweet cravings any time of day.
Best Ways to Serve and Pair This Dish
These cookies make an excellent standalone treat, but they can be elevated with some simple pairings. Serving them warm with a scoop of vanilla ice cream creates a delightful contrast of temperatures and textures. They are also fantastic with a cup of coffee or milk, enhancing the chocolate flavors.
To switch things up, consider adding toppings like crushed hazelnuts or a sprinkle of sea salt before baking for added dimension. Alternatively, sandwich two cookies with whipped cream or Nutella for a luxurious dessert option.
Storage, Reheating, and Meal Prep Tips
Once the cookies have cooled, store them in an airtight container at room temperature for up to a week. If you want to keep them fresh longer, you can refrigerate them, where they will last for about two weeks. For freezing, place them in a single layer in a freezer-safe bag or container. They can be stored frozen for up to three months.
When you’re ready to enjoy them, simply thaw them at room temperature or warm them briefly in the microwave for a few seconds. This quick reheating brings back that freshly baked goodness.
For meal prep, consider making a double batch and freezing half the dough before baking. Portion the dough into balls and freeze them on a baking sheet, then transfer to a bag once frozen. When you want fresh cookies, just bake them from frozen—adding a couple of extra minutes to the baking time.
Common Mistakes to Avoid
To ensure the best results, avoid overmixing the dough. This can result in overly tough cookies instead of the nice chewy texture you’re after. Another common mistake is not measuring ingredients accurately, particularly the flour. Too much flour can make the cookies dry, while too little can lead to cookies that spread too much.
Additionally, ensure your oven is calibrated correctly. An oven that runs hot can lead to burnt edges while leaving the centers raw. Use an oven thermometer if you’re unsure about your appliance’s accuracy.
Creative Variations and Customizations
This cookie recipe is highly versatile. Here are some variations to try:
- Nut and Chocolate Chunk Cookies: Incorporate a half cup of chopped nuts such as walnuts or pecans for added crunch. You can also throw in chocolate chunks or chips for extra chocolatey goodness.
- Peanut Butter Swirl: Mix in a few tablespoons of peanut butter for a delightful flavor contrast.
- Spice It Up: Add a pinch of cinnamon or a dash of vanilla extract for warmth and depth.
- Stuffed Cookies: Place a few pieces of caramel or chocolate in the center before sealing the dough ball to create stuffed cookies.
Feel free to experiment; the base recipe is forgiving and allows for creativity!
Frequently Asked Questions
make ahead
Absolutely! You can prepare the dough ahead of time. Store it in the refrigerator for up to three days or freeze for several months.
freezing
Yes, the cookies freeze well. Remember to let them cool completely before placing them in an airtight container or freezer bag. Don’t forget to label the container with the date!
kid-friendly
These cookies are perfect for kids! They are simple to make and involve minimal steps, making them a great activity for family baking sessions. Kids will enjoy scooping the dough and placing it on the baking sheet.
gluten-free / dairy-free
To make these cookies gluten-free, substitute the all-purpose flour with a gluten-free flour blend. For a dairy-free version, verify that your Nutella or alternative chocolate spread is dairy-free.
bonus FAQ
For anyone who wants to add a personal touch, consider experimenting with flavor extracts or zesting citrus into the dough for a refreshing twist.
Conclusion
Baking cookies shouldn’t feel like a chore, and this recipe embodies that philosophy. With its simple ingredients and quick preparation, you can satisfy your sweet cravings without putting in hours of effort. Whether enjoyed fresh out of the oven or piled high on a plate for sharing, these cookies promise to delight. Make them your own with different additions, and watch as they become a staple in your dessert rotation.

Leave a Comment