# Delightful Easter Cookies Recipe
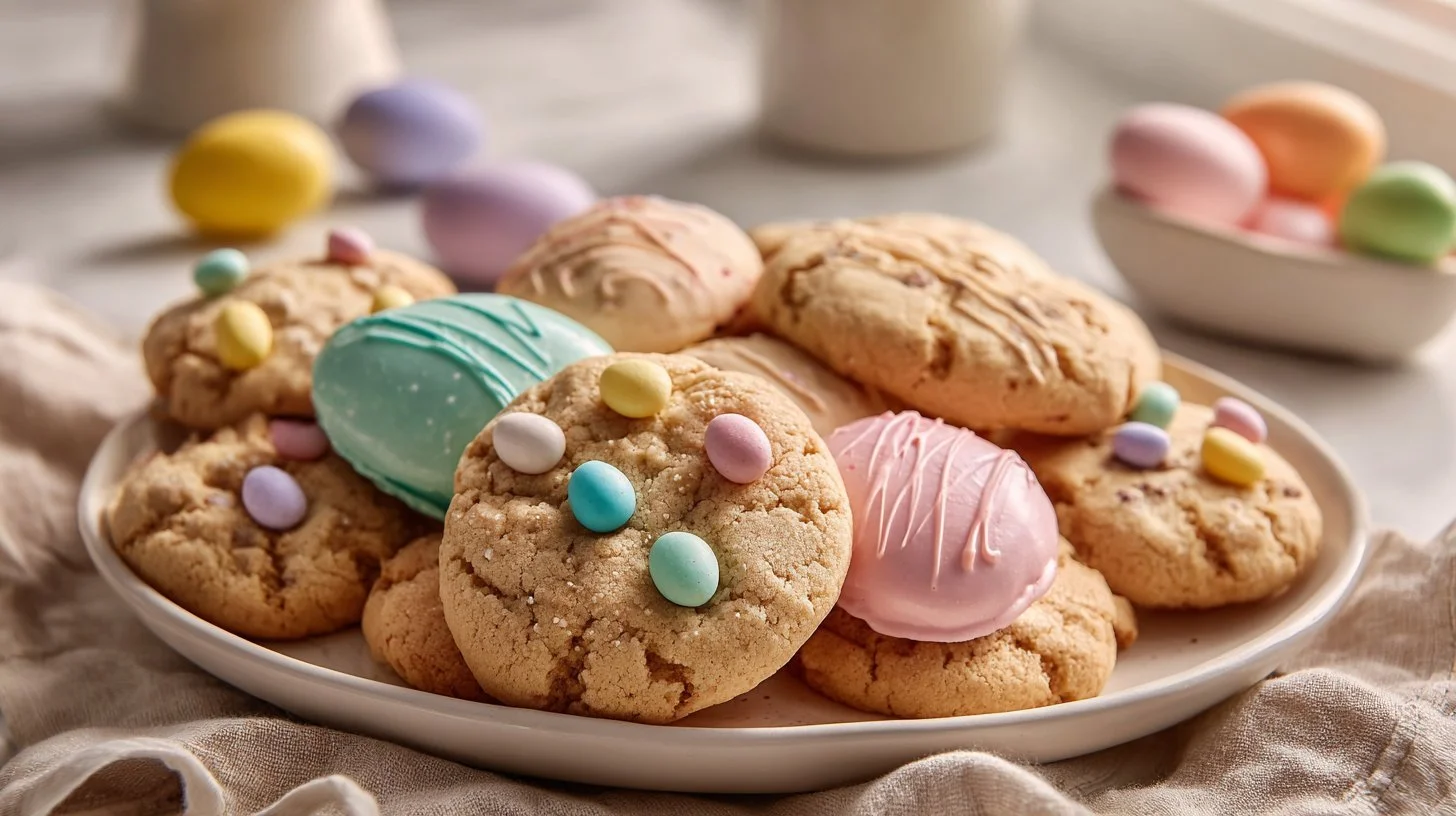
When spring rolls around, everything comes to life, and there's no better way to celebrate the season than with delicious, festive **Easter Cookies**. These cookies are not just a sweet treat; they embody the spirit of togetherness and joy that Easter brings. Whether you're celebrating with family, hosting an egg hunt, or just indulging in some guilty pleasures while watching the colorful blooms emerge, these cookies are bound to be a hit. With their vibrant colors and delightful sweetness, they add a whimsical touch to any Easter gathering.
In this article, I’ll guide you through the process of creating these lovely Easter Cookies from scratch. Not only will I provide you with the recipe, but I’ll also share tips, variations, and everything you need to know to make your cookie baking a success this Easter season.
## Why You’ll Love This Recipe
- **Simplicity**: This recipe features basic ingredients that you probably already have at home, making it straightforward and accessible for bakers of all levels.
- **Customizable Decor**: With icing in colors of your choice and an array of sprinkles and edible glitter, the decoration possibilities are endless, allowing your creativity to shine.
- **Family Fun**: Involve your kids or loved ones in decorating and shaping the cookies. It’s a perfect way to create cherished memories together.
- **Perfect for Any Event**: These cookies are versatile and can be enjoyed not just at Easter but also at birthdays, baby showers, or any springtime celebration.
- **Make Ahead Option**: You can prepare the dough in advance and bake the cookies when you’re ready, making it a hassle-free addition to your Easter plans.
- **Deliciously Soft Texture**: These cookies boast a soft, buttery texture that melts in your mouth, offering the perfect balance of sweetness.
## What Makes This Recipe Special
The uniqueness of these **Easter Cookies** comes from their perfect blend of flavors and textures. The recipe includes unsalted butter, which provides richness and depth, while the granulated sugar gives that delightful sweetness. Each cookie is enhanced with pure vanilla extract that complements the buttery flavor beautifully. The addition of baking soda and baking powder ensures the cookies rise just right, giving them a tender bite that you’ll love.
As for the icing, it’s the cherry on top (quite literally!) that allows for festive creativity. With a selection of colors, you can transform plain cookies into colorful masterpieces. Whether you choose pastel hues or vibrant shades, the icing and toppings will bring these cookies to life, making them irresistible.
## Ingredients
- 2 ¾ cups all-purpose flour
- 1 teaspoon baking powder
- ½ teaspoon baking soda
- ½ teaspoon salt
- 1 cup unsalted butter, softened
- 1 ½ cups granulated sugar
- 1 large egg
- 2 teaspoons pure vanilla extract
- Colors of your choice for icing (powdered sugar-based icing)
- Sprinkles, chocolate chips, or edible glitter for decoration

### Ingredient Notes and Easy Substitutions
- **Unsalted Butter**: Using unsalted butter allows you to control the overall saltiness of the cookies. If you only have salted butter, simply reduce the amount of salt in the recipe by a pinch.
- **Granulated Sugar**: You can substitute half of the granulated sugar with brown sugar for a deeper flavor and a chewier texture.
- **Flour**: While all-purpose flour works best for this recipe, you can experiment with gluten-free flour blends if you're accommodating dietary restrictions.
- **Icing Colors**: Use gel food coloring for vibrant hues that won't dilute your icing.
## Instructions
1. **Preheat the Oven**: Start by preheating your oven to 350°F (175°C) and lining your baking sheets with parchment paper.
2. **Mix Dry Ingredients**: In a medium bowl, whisk together the flour, baking powder, baking soda, and salt until well combined. Set aside.
3. **Cream Butter and Sugar**: In a large bowl, combine the softened butter and granulated sugar. Using a hand mixer or stand mixer, beat until the mixture is light and fluffy.
4. **Add Egg and Vanilla**: Beat in the egg and vanilla until fully combined.
5. **Combine Wet and Dry Ingredients**: Gradually mix in the dry ingredients, ensuring no flour is left unmixed. You want a soft dough that holds together well.
6. **Chill the Dough**: For best results, cover the dough and chill in the refrigerator for about 30 minutes. This step is optional but helps prevent the cookies from spreading too much during baking.
7. **Shape Cookies**: Roll the dough into balls or use cookie cutters to create festive shapes, placing them evenly spaced on your baking sheets.
8. **Bake**: Bake in the preheated oven for about 10-12 minutes, or until the edges just begin to turn golden brown.
9. **Cool the Cookies**: Let the cookies cool on the baking sheets for five minutes before transferring them to wire racks to cool completely.
10. **Decorate**: Once the cookies are completely cool, prepare your icing and let your creativity shine with colorful designs.
## Expert Tips for the Best Results
- **Butter Temperature**: Ensure your butter is softened—leave it out at room temperature for about 30-60 minutes before starting. This aids in creating a light and fluffy dough.
- **Don’t Overmix**: Once you combine the wet and dry ingredients, mix just until combined. Overmixing can lead to tough cookies.
- **Baking Time**: Keep a close eye on your cookies as they bake. The slight golden edge is what you’re looking for; overbaking can make them hard.
## Variations
1. **Chocolate Chip Easter Cookies**: Add 1 cup of chocolate chips to the dough for a delightful twist.
2. **Nutty Delight**: Fold in ½ cup of chopped nuts, like pecans or walnuts, for a crunchy texture.
3. **Lemon Zest**: Enhance the flavor by adding a teaspoon of lemon zest to the dough for a refreshing citrus kick.
4. **Decorative Sugar**: Use colored sugar instead of icing for a simpler, but equally festive look.
5. **Coconut Flakes**: Mix in ½ cup of sweetened coconut flakes for a tropical flair.
## Serving Suggestions
These delightful **Easter Cookies** can be enjoyed on their own, but they can also be a part of a larger springtime dessert spread. Consider serving them alongside:
- Fresh fruit platters
- Spring-themed cupcakes
- A light and fruity punch
- Mint tea or lemonade for a refreshing sip
For presentation, arrange the cookies on a decorative platter adorned with fresh flowers or Easter-themed decorations to enhance the festive spirit.
## Storage and Reheating
Store your **Easter Cookies** in an airtight container at room temperature for up to one week. If you want to keep them fresh for longer, you can freeze them in a freezer-safe bag or container for up to three months. To enjoy them later, let them thaw at room temperature for about an hour.
## Common Mistakes to Avoid
- **Not Measuring Ingredients Properly**: Use a kitchen scale or measuring cups appropriately to ensure you have the right quantities.
- **Skipping Chilling the Dough**: If you skip this step, your cookies may spread too much during baking, resulting in a flatter cookie.
- **Not Letting Cookies Cool**: Allowing cookies to cool on the baking sheet before transferring them helps them to set up properly and prevents breakage.
## FAQ
**Q: Can I make the dough ahead of time?**
A: Yes! You can prepare the dough a day in advance and store it in the fridge. Just let it sit out for a few minutes before rolling it out.
**Q: Is there a gluten-free option for this recipe?**
A: Absolutely! Substitute the all-purpose flour with a 1-for-1 gluten-free flour blend.
**Q: How can I get bright colors in my icing?**
A: Gel food coloring works best to achieve vibrant hues without affecting the icing's consistency.
**Q: Can I omit the sprinkles for a simpler look?**
A: Definitely! The cookies are delicious on their own, and the icing can be left plain if preferred.
**Q: How long will the decorated cookies last?**
A: If stored properly in an airtight container, decorated cookies can last for about a week.
## Conclusion
These **Easter Cookies** are not just a treat; they’re a celebration of creativity, flavor, and springtime joy. With their delightful taste and charming decorations, they’re the perfect addition to any Easter gathering or simply a sweet distraction for yourself at home. So gather your ingredients, roll up your sleeves, and let the baking begin! Don’t forget to share your creations on social media—everyone will want to try the magic of your Easter Cookies. Happy baking!


Leave a Comment